
2hen a character triggers the Swirl reaction, all party members’ Normal, Charged and Plunge Attack DMG is increased by 20% for 10s, max 3 stacks.
This effect can be triggered once every 0.1s and each stack is timed independently.
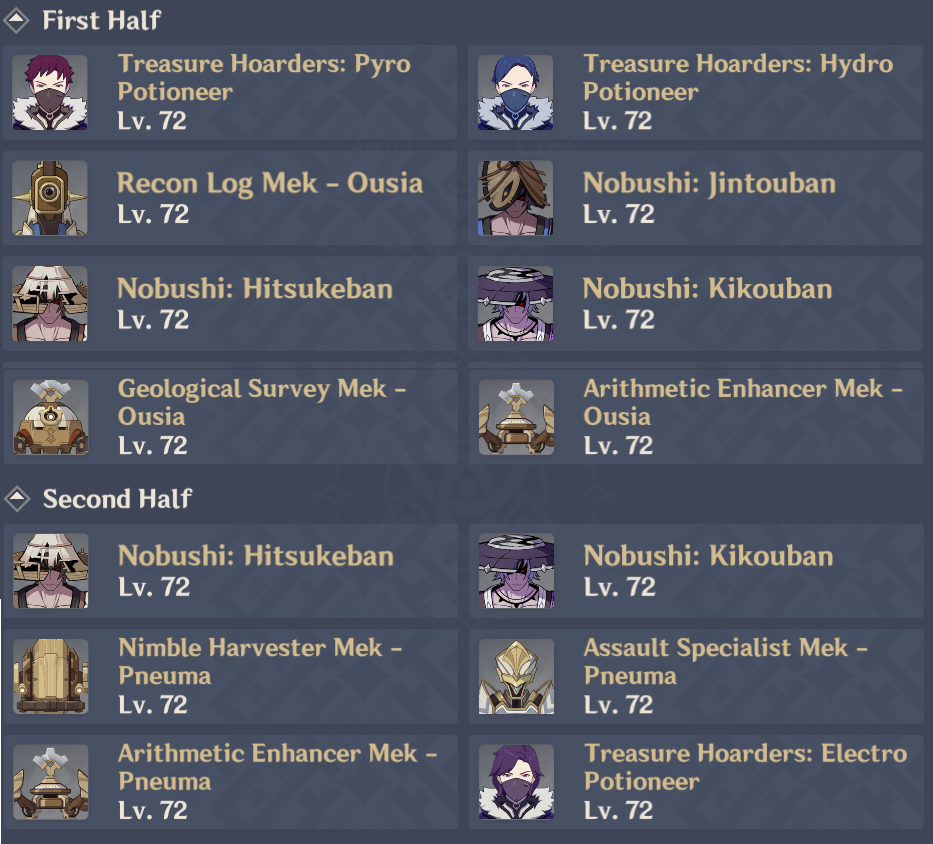


Ley Line Disorder


4.5 Enemy
To temporarily paralyze it, freeze the target and then disrupt its frozen state with elemental reactions.


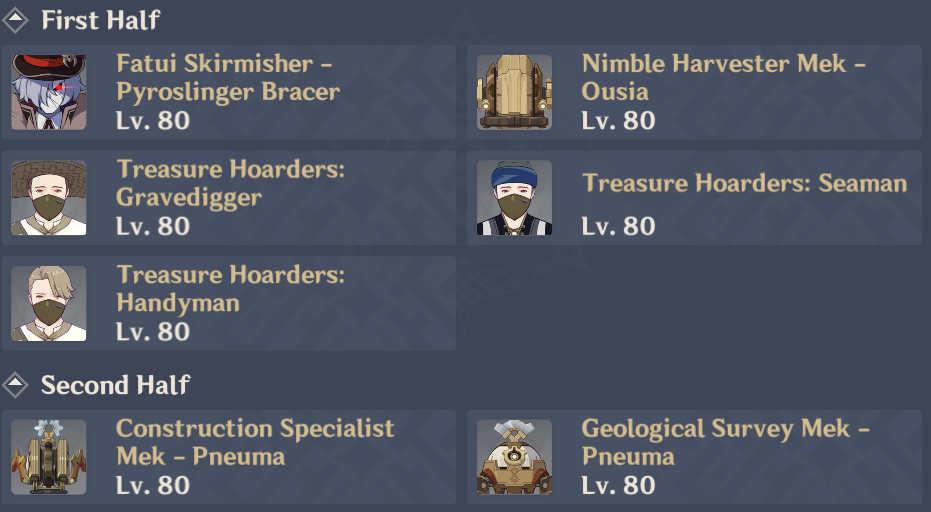
Ley Line Disorder


Data collection for 4.4 Spiral Abyss Floor 12 is in progress.
Please wait patiently.


4.5 boss


4.5 boss

4.5 boss
© 2023 Genshinlab All Rights Reserved
Wuthering Waves
Zenless Zone Zero